

Electrical outlets often show wear that can cause sparks, shocks, or fires, so you should inspect them for loose plugs, discoloration, buzzing, or warmth; this guide explains how to check safely-turn off power before touching and replace damaged receptacles to protect your home and maintain reliable, safe operation.
How to Inspect Outlets Safely
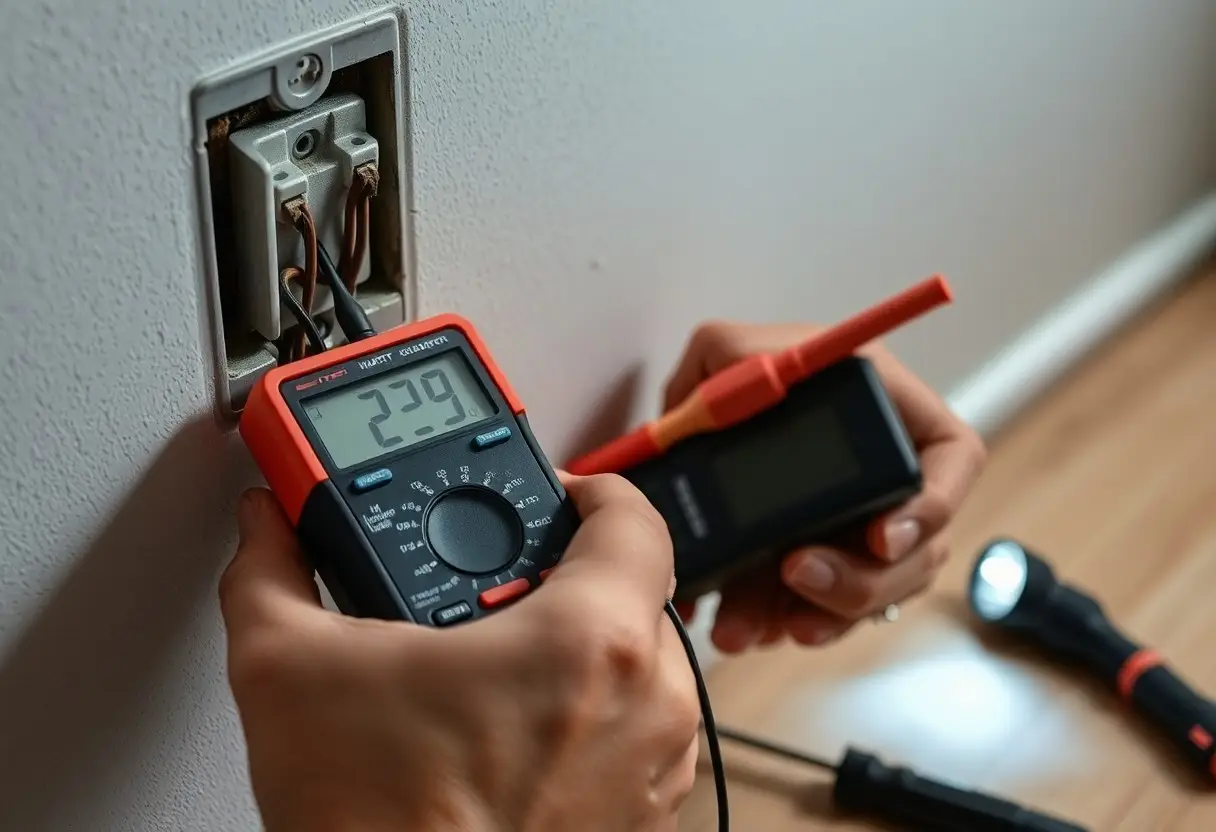
You should move methodically: scan for scorch marks, cracks, or discoloration, then verify power state with a non-contact tester before any contact. For typical US circuits expect about 120 V; if you encounter sparking, buzzing, or heat, shut off the breaker and document the outlet location and symptoms-these signs often point to loose neutrals, overloaded circuits, or failing receptacles.
Essential tools and safety precautions
You should carry a non-contact voltage tester, plug-in outlet tester, multimeter, insulated screwdriver, and PPE (insulated gloves, safety glasses). First turn off the breaker and confirm absence of voltage with your tester; then tag the panel if you’ll leave it off. Use an outlet tester monthly-GFCIs typically trip at about 4-6 mA-and do not work on live circuits or touch exposed conductors without verification.
Step-by-step visual and tactile inspection
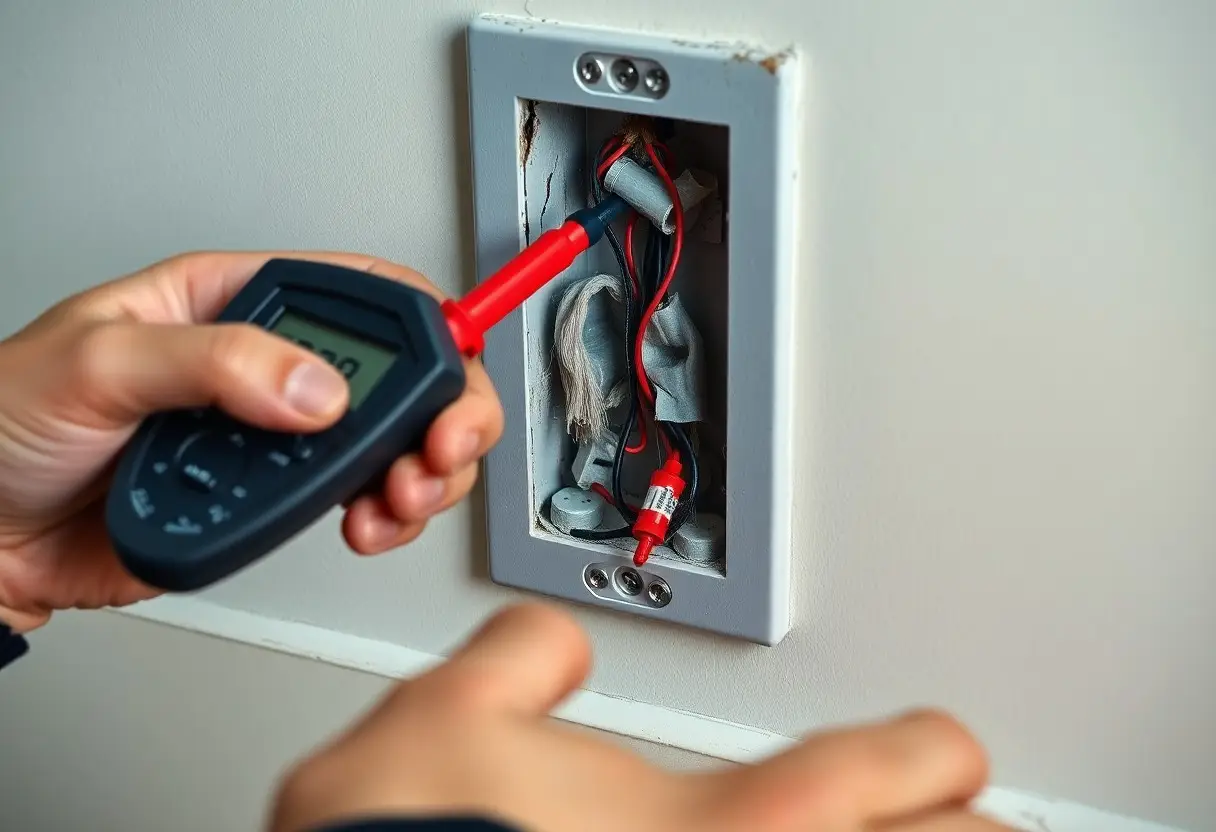
You should start visually after confirming power is off: remove the faceplate, inspect the receptacle and wiring for blackening, melted plastic, loose screws, or frayed insulation. Gently wiggle a plugged-in device (with power on only for that test) to check for loose fit; if the plug moves or the outlet gets warm within a few minutes, label it hazardous and cut power again before further work.
You can follow a concise checklist for consistency: verify power off, scan for visible damage, remove the cover to inspect connections, gently test terminal tightness, then perform live tests only when needed and with caution-document any outlet that shows heat, arcing, or loose wiring for repair or replacement.
Detailed inspection checklist
| Step | What to look for / Action |
| Turn off breaker | Use the panel to switch off circuit and confirm no voltage with a non-contact tester. |
| Visual scan | Check faceplate and receptacle for scorching, cracks, or discoloration. |
| Remove cover | Inspect wiring for frayed insulation, burnt insulation, and proper wire seating under terminals. |
| Check tightness | Gently tug wires and tighten terminal screws; loose neutrals often cause intermittent power. |
| Live fit test | With power on briefly, test plug fit and for buzzing or warmth; loose receptacles are a fire risk. |
| Functional test | Use an outlet tester or multimeter to check hot/neutral/ground and GFCI operation (test monthly). |
| Replace or call pro | If you see arcing, burned wires, persistent heat, or unknown wiring, stop and hire a licensed electrician. |
Common Signs of Wear and Tear
Physical damage, discoloration, and loose components
You should watch for cracked or chipped faceplates, hairline fractures in the receptacle, browning or black soot around the slots, and melted or deformed plastic. If the outlet or cover plate moves when you plug or unplug a cord, or the receptacle pulls away from the wall by more than a few millimeters, you likely have stripped mounting screws or damaged box anchors. Exposed wiring or a gap larger than 1/8″ under the plate demands immediate attention.
Electrical symptoms: heat, sparks, buzzing, and tripping
If an outlet is warm or hot to the touch, emits sparks when a plug is inserted, produces a buzzing/hissing sound, or causes breakers/GFCIs to trip repeatedly, you face an electrical fault. Persistent tripping when you connect a 1,200-1,500 W appliance (hair dryer, space heater) suggests an overloaded or compromised circuit. Treat sparks, loud buzzing, and frequent trips as signs of active danger until proven otherwise.
Loose connections, corrosion, or damaged insulation often cause these symptoms by increasing resistance and producing arcing; an arc can reach extremely high temperatures and ignite surrounding materials. You can use a non-contact voltage tester and an infrared thermometer-spots more than 5-10°F (3-6°C) above adjacent surfaces indicate a hotspot-to confirm. If voltage fluctuates, outlets flicker, or you see visible arcing, shut off power and have a qualified electrician inspect and repair the circuit.
Factors That Accelerate Outlet Deterioration
You’ll see outlets degrade faster when environmental and usage stresses combine: moisture, dust, rapid temperature swings, overloading, frequent plugging, and poor contacts. Metal components corrode, insulation hardens, and contacts loosen so arcing and overheating become more likely; in harsh settings failures can appear in months rather than years. Recognizing these accelerants helps you prioritize inspections and address the riskiest receptacles first.
- Moisture
- Dust
- Temperature
- Overloading
- Frequent plugging
- Poor contacts
Environmental factors: moisture, dust, and temperature
In areas with persistent moisture (bathrooms, basements) you can see corrosion and green deposits on contacts within months; settling dust and lint trap heat and hold moisture, and repeated temperature cycling loosens terminals. Kitchens and garages often combine these stresses, so outlets there age much faster than in living rooms. Knowing which rooms expose outlets to dampness, dust, or thermal swings lets you set more frequent inspection and cleaning schedules.
Environmental effects at a glance
| Condition | Effect / Examples |
| Moisture | Corrosion, greenish deposits, GFCI requirement near sinks/showers |
| Dust | Insulation of heat, clogging behind plates, motorized outlets in workshops |
| Temperature | Thermal expansion loosens screws, accelerates insulation aging |
- Moisture
- Dust
- Temperature
Usage factors: overloading, frequent plugging, and poor contacts
When you regularly run appliances that draw near or above a circuit’s rating-like space heaters or hair dryers-you create sustained overloading that heats contacts and insulation; frequent plugging wears retention springs and increases poor contacts, causing resistance and intermittent arcing. Outlets on heavily used circuits can show discoloration or looseness long before others. Knowing which outlets feed high‑draw devices helps you redistribute loads or upgrade the circuit before failure.
- Overloading
- Frequent plugging
- Poor contacts
- Arcing
Continuous loads above 80% of a branch circuit rating (for example, sustained 12 A on a 15 A circuit) speed thermal degradation of plastics and copper; repeated mechanical cycles-often hundreds to thousands of plug/unplug actions in kitchens or workshops-wear the spring clamps and increase arcing and visible scorching. You can spot advanced wear as discoloration, loose fit, or buzzing under load. Knowing these failure patterns lets you choose dedicated circuits, higher‑rated receptacles, or scheduled replacements to reduce fire and shock risk.
- 80% rule
- High‑draw appliances
- Mechanical wear
- Scorching / discoloration
Quick Maintenance and Troubleshooting Tips
You should inspect electrical outlets every 6 months for discoloration, warmth, or loose plugs and test GFCI units monthly with a plug-in tester to verify wiring and polarity. Swap appliances between outlets to isolate faults and replace scorched faceplates or cracked receptacles immediately. Any time you detect burning smells or sparks, shut off the circuit and call a licensed electrician.
- Maintenance: Inspect every 6 months; clean dust and tighten screws.
- GFCI testing: Press the test button monthly; ensure downstream protection.
- Breakers: Label circuits and reset by switching fully off then on.
- Troubleshooting: Use a plug-in tester and isolate devices to find faults.
Cleaning, tightening, and faceplate care
You should always turn off the circuit before cleaning; remove the faceplate and brush dust with a soft, dry brush, then wipe with a slightly damp cloth if needed. Tighten mounting and terminal screws until snug-manufacturers often recommend about 12 in‑lb (1.4 N·m) for receptacle screws-avoiding over‑torque. Replace cracked faceplates and broken mounting ears to prevent contact with live parts and to maintain proper grounding.
Testing GFCIs, resetting breakers, and simple fixes
Test each GFCI by pressing the TEST button, which should cut power, then press RESET to restore it; do this monthly and after storms. Reset tripped breakers by moving fully to OFF then ON; if a breaker trips repeatedly, treat it as a sign of overload or a persistent fault. Simple fixes you can do include replacing a damaged outlet, swapping a suspect appliance, or tightening loose terminals.
For deeper GFCI troubleshooting, identify whether the device is a receptacle or a circuit-breaker style in the panel and confirm downstream protection by unplugging downstream loads before testing. If a GFCI won’t reset, first verify the breaker feeding it is on and there are no visible hot wires or scorched parts; replace the receptacle only if you can confirm correct wiring (line/load) and the replacement matches the original amperage. When a breaker trips, note the load on that circuit-multiple devices on a 15 A circuit can easily exceed capacity-and after a reset, monitor for recurrence. Any repeated trips, persistent ground faults, or signs of overheating require a licensed electrician.
When to Repair or Replace – Practical How-To Guidance
If an outlet has cracked faces, loose plugs, visible corrosion, intermittent contact, or fails a voltage test, replace it; minor issues like a loose cover or a slightly wobbly receptacle can be fixed by tightening screws and swapping the device. Typical 120V/15A outlet replacement takes about 15-30 minutes and parts cost roughly $2-$10, but stop and call a pro for the hazardous signs listed below.
Basic DIY replacement steps and safety limits
Shut off the circuit at the breaker and confirm no voltage with a non-contact tester or multimeter, photograph wiring, note which conductor is hot/neutral/ground, loosen terminals and transfer wires to a matching-rated replacement (15A/20A, 120V), tighten firmly and restore power to test. Allow about 15-30 minutes per receptacle if wiring is copper and straightforward; do not attempt work on aluminum wiring, multi-wire branch circuits, or charred connections-those exceed DIY limits.
Signs that require a licensed electrician
Engage a licensed electrician for sparks, smoke, burning odors, repeated breaker trips, electric shock, black scorch marks, buzzing, or outlets that stay warm. Also call a pro for persistent GFCI failures, ungrounded 3‑prong outlets, or faults that return after DIY fixes, since these often indicate hidden wiring faults or overloaded circuits needing specialized diagnostics.
Arcing and loose neutrals can generate enough heat to ignite insulation; electricians use thermal imaging, clamp meters, insulation resistance tests, and circuit tracers to locate faults. Homes with aluminum conductors or knob‑and‑tube wiring may require COPALUM repairs or full rewiring, and a professional inspection typically runs about $150-$400 when multiple outlets or repeated breaker trips suggest systemic problems.
Summing up
So you can quickly assess outlets by visually inspecting for cracks, discoloration, scorch marks, loose faceplates or plugs, and by testing voltage with an outlet tester or multimeter; note any buzzing, sparks, or burning smells. Turn power off before tightening or replacing receptacles, and avoid DIY fixes beyond basic checks. If you find overheating, exposed wiring, or inconsistent readings, contact a licensed electrician for repair or replacement to keep your wiring safe.