

Home safety begins with working smoke detectors; you should test your units monthly and after any repairs to confirm proper operation. This guide gives clear, authoritative steps for battery and hardwired models, safe ladder use, and avoiding nuisance alarms. Because a failed detector poses a life-threatening risk, follow manufacturer instructions and replace aged units promptly. Regular testing gives you confidence your family is protected and lowers fire risk.
Understanding Smoke Detectors
Types of detectors (ionization, photoelectric, dual-sensor)
Ionization units detect small combustion particles from fast, flaming fires, while photoelectric units respond quicker to large-particle, smoldering fires; dual-sensor alarms combine both to broaden detection and reduce missed events. You should place photoelectric devices near living and sleeping areas, and use dual-sensor or a mix of types for whole-home coverage. Perceiving these differences helps you match detector type to the specific fire risks in your home.
- Ionization
- Photoelectric
- Dual-sensor
| Detector Type | Typical Strength |
| Ionization | Fast-flaming fires; sensitive to small particles |
| Photoelectric | Smoldering fires; sensitive to large particles and visible smoke |
| Dual-sensor | Combines both technologies for broader coverage |
| Maintenance & Lifespan | Replace alarms every 10 years; change batteries yearly or use sealed 10-year batteries |
How detectors work and key factors affecting performance
Photoelectric alarms use a light beam scattered by smoke; ionization sensors detect changes in an ion current caused by particles, and both rely on clean chambers and steady power to operate. You must watch for dust, humidity, aerosol sprays, poor placement, and dead batteries, since these factors cause delays or false alerts. Assume that if you test monthly and keep vents and sensors clean, you preserve reliability.
- Placement
- Power source
- Maintenance
You should mount alarms on ceilings near room centers and within 10 feet of bedrooms for fastest warning; avoid installing within 3 feet of cooking appliances to reduce nuisance alarms, and follow manufacturer spacing-high ceilings (>12 ft) may need wall mounting or additional units. If you have interconnected alarms, a single activation alerts the whole house, improving escape time. Assume that following NFPA placement guidance and manufacturer instructions helps you maximize effectiveness.
- Interconnectivity
- Manufacturer instructions
- Testing
Preparation Before Testing
Safety checklist and required tools
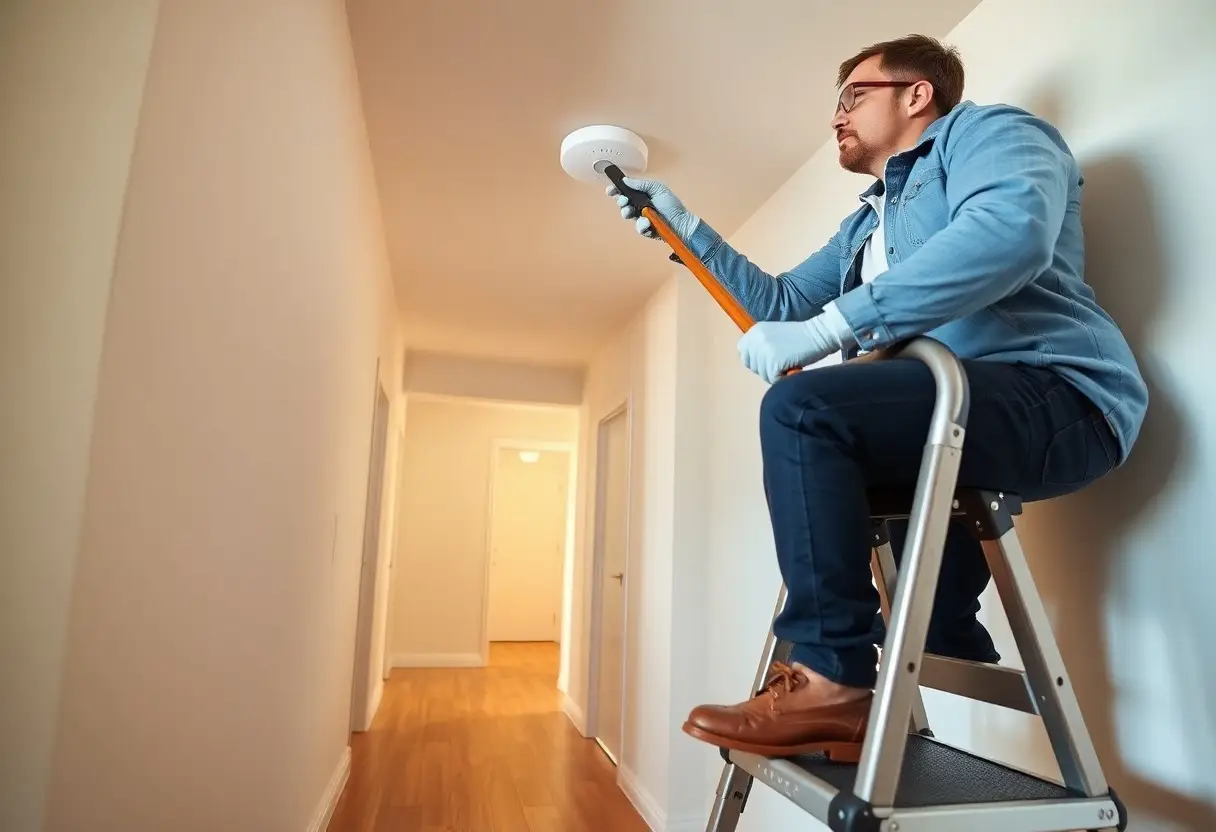
You should gather a sturdy ladder, fresh batteries, a long-handled tester or canned smoke, a small flashlight, and basic PPE like eye protection and gloves. Keep a charged phone and a nearby fire extinguisher, and alert household members so no one is surprised by loud alarms. Recognizing that alarms can trigger strong reactions, secure pets and inform neighbors if testing will set off audible alerts.
- ladder
- batteries
- smoke tester
- flashlight
- fire extinguisher
- PPE
Factors to consider (location, occupants, pets, ventilation)
You should prioritize detectors near sleeping areas and one per floor, and avoid placing units within 10 feet of cooking appliances to reduce false alarms. Account for occupants under 5, over 65, or with mobility limits by scheduling assistance and brief tests; pets may bolt or hide when alarms sound. Recognizing that HVAC and open-plan layouts can spread test smoke, isolate the test area and pause ventilation during smoke-based checks.
- location
- occupants
- pets
- ventilation
- HVAC
You should test every detector on each floor-studies show homes with at least one working alarm per floor cut fire fatality risk significantly-keeping bedroom detectors prioritized. For aerosol tests, turn HVAC off for 5-10 minutes, keep windows closed during the check, then ventilate; if someone has asthma or COPD, use the unit’s test button instead of sprays. Recognizing that sensory-sensitive occupants and pets may need advance notice or temporary relocation, plan tests at times that minimize disruption.
- test button
- multi-floor
- distance from kitchen
- HVAC off 5-10 min
- ventilate after
How-to Test Alarms Safely
Using the test button and routine checks
You should press and hold the alarm’s test button for 3-5 seconds every month to verify the horn and LED work; the siren should reach at least 85 dB at 10 feet per NFPA guidance. While on a stable ladder, inspect vents and housing for dust, record the date, and replace batteries annually or if the unit chirps. If interconnected alarms don’t all sound, treat that as a serious malfunction and repair or replace the unit immediately.
Safe simulated smoke testing methods and precautions
Use a manufacturer-approved smoke test aerosol or canned smoke designed for detectors rather than open flames, incense, or cigarettes; apply short 1-second bursts from about 6-12 inches away while HVAC and fans are off so the plume reaches the sensor. Keep household members and pets out of the area, ventilate for 5-10 minutes afterward, and avoid repeated heavy sprays that can coat sensors-only use products labeled for smoke detector testing.
Before using canned smoke, notify everyone and turn off air handlers to prevent false dispersal; then follow the can’s instructions, give the alarm up to three brief bursts, and confirm both local and interconnected units respond. If an alarm fails after testing, replace it or call a certified technician; prolonged exposure to nonapproved aerosols can void warranties or damage sensors, so limit testing to short bursts with approved products and document results for future reference.
Tips for Regular Maintenance
You should perform routine maintenance on every smoke detector by testing monthly, replacing batteries yearly or using sealed 10-year cells, and cleaning vents every three months to reduce false alarms. Inspect for physical damage, keep alarms at least 10 feet from cooking appliances, and replace units when they reach 10 years of service. The best practice is to log each action and set calendar reminders.
- Test smoke detectors monthly
- Replace batteries yearly or use 10-year lithium
- Clean vents and housings every 3 months
- Replace units after 10 years
Battery, cleaning, and schedule tips
You should swap alkaline batteries yearly unless using sealed 10-year lithium cells, and check backup cells in hardwired units during monthly tests. Use a soft brush or compressed air to remove dust quarterly and avoid solvents near sensors. Create a visible maintenance schedule-monthly tests, quarterly cleaning, annual battery check-and mark dates on a shared calendar. Any replacement schedule should follow manufacturer guidance and be entered in your household log.
- Replace batteries annually (or use 10-year cells)
- Clean detector vents every 3 months
- Test smoke detectors monthly
Recordkeeping and household testing routines
Keep a simple recordkeeping log with date, location, action taken, battery type, and test result so you can spot failing units or recurring nuisance alarms. Use a spreadsheet, shared calendar, or an app and assign rooms to household members to maintain consistent testing routines, marking replacements at the 10-year interval.
Create columns like Date, Location, Action, Battery, and Result and enter each monthly test-example: 2026-01-15 | Upstairs hallway | Tested, cleaned, replaced AA | Pass. The NFPA advises testing at least monthly and replacing units after 10 years, so set phone reminders and a shared calendar task per floor; if a detector fails more than twice in six months, replace it or have wiring inspected.

Troubleshooting and Common Issues
Intermittent chirps, false alarms, and sensor faults
Intermittent chirps every 30-60 seconds usually indicate a low battery or loose backup connection-replace the 9V/AA or check the hardwired backup first. False alarms often stem from cooking steam, dust, or insects; vacuum the sensing chamber and relocate units 10-20 feet from kitchens. Photoelectric detectors reduce cooking false alarms compared with ionization models. If the LED flashes or an error code appears, treat it as a sensor fault and replace the unit, especially if it’s over 10 years old.
When to call a professional
If chirps persist after battery changes and cleaning, or if a hardwired or interconnected system trips multiple units, call a licensed electrician or NFPA‑certified fire alarm technician. Also call when red LED fault codes remain, alarms won’t reset after power restoration, or you detect wiring smells or visible damage; these issues can indicate wiring faults that affect multiple detectors and your home’s safety.
Expect the technician to measure line voltage (~120 V AC), test interconnect wiring continuity, inspect date codes for end‑of‑life, and perform module or unit replacements. Ask for a written estimate-service calls typically run about $75-200, with repairs or replacements commonly $150-400 depending on unit count and wiring complexity-and keep model numbers and invoices for warranty or follow‑up inspections.
Conclusion
Ultimately, you should test your smoke detectors monthly by pressing the test button, replacing batteries annually or when low, and using a stable step ladder and flashlight to inspect units safely. Keep sensors free of dust, follow manufacturer instructions, notify your household before testing, and replace detectors older than 10 years or if they fail tests. If you detect persistent faults, contact a qualified technician.